

It all started with this tile. You know, the one right in the middle, that basically is shining so bright, just grabbing the attention of any innocent passerby, saying "pick me, pick me"! So, that very day, we purchased every palette they had. & this is what lit the fire under our behinds to get our bathroom remodel started, something we had been talking about since we moved in.

That same weekend we were shopping at Costco, you know, spending $400 on who knows what, and we came across this! We loved it! Double vanity, quartz top, a beautiful shade of gray. We knew it would be perfect for our new bathroom. Purchasing this set all together actually became more cost efficient, rather than buying the cabinets separately and the stone on top cut to match. We were very happy about this find, especially when we had been looking for 2 years for one we liked enough (in our price range) at hardware stores. I don't see the exact one but check out the Costco website to see all of their options and sizes)!

Next came demo day! Like Chip and Jo Jo, DEMO DAY is the start of the new. The only thing we realized is although demo day proves to be fun, it is also intimidating. It took my dad to come over, [the family handyman], to start knocking things off the wall, ripping things out. I think it's harder to demolish your own things. Especially when we knew our working bathroom was very quickly out of commission for who knows how long?! We took out the shower, toilet and vanity. This left many holes that we had to patch up but we were excited knowing it was the start. No turning back now!


As we wanted to do most of this project ourselves, we knew that plumbing was something we didn't want to mess around with. We have heard horror stories of mold growing behind walls and secret leaks that could cause a whole lot of havoc. We paid $860 for the plumber to remove the drain and install the plumbing for the drain and tub. He also installed the tub. We felt confident in him doing this part of the project for us. We purchased a delta tub from Home Depot (link here), which was very cost efficient. Since this is the guest bathroom, we didn't need anything fancy.

Next came the backsplash. We chose tradition 3' x 6' subway tile from Home Depot (linked here). For backslashing, you will need 1) 2) 3)


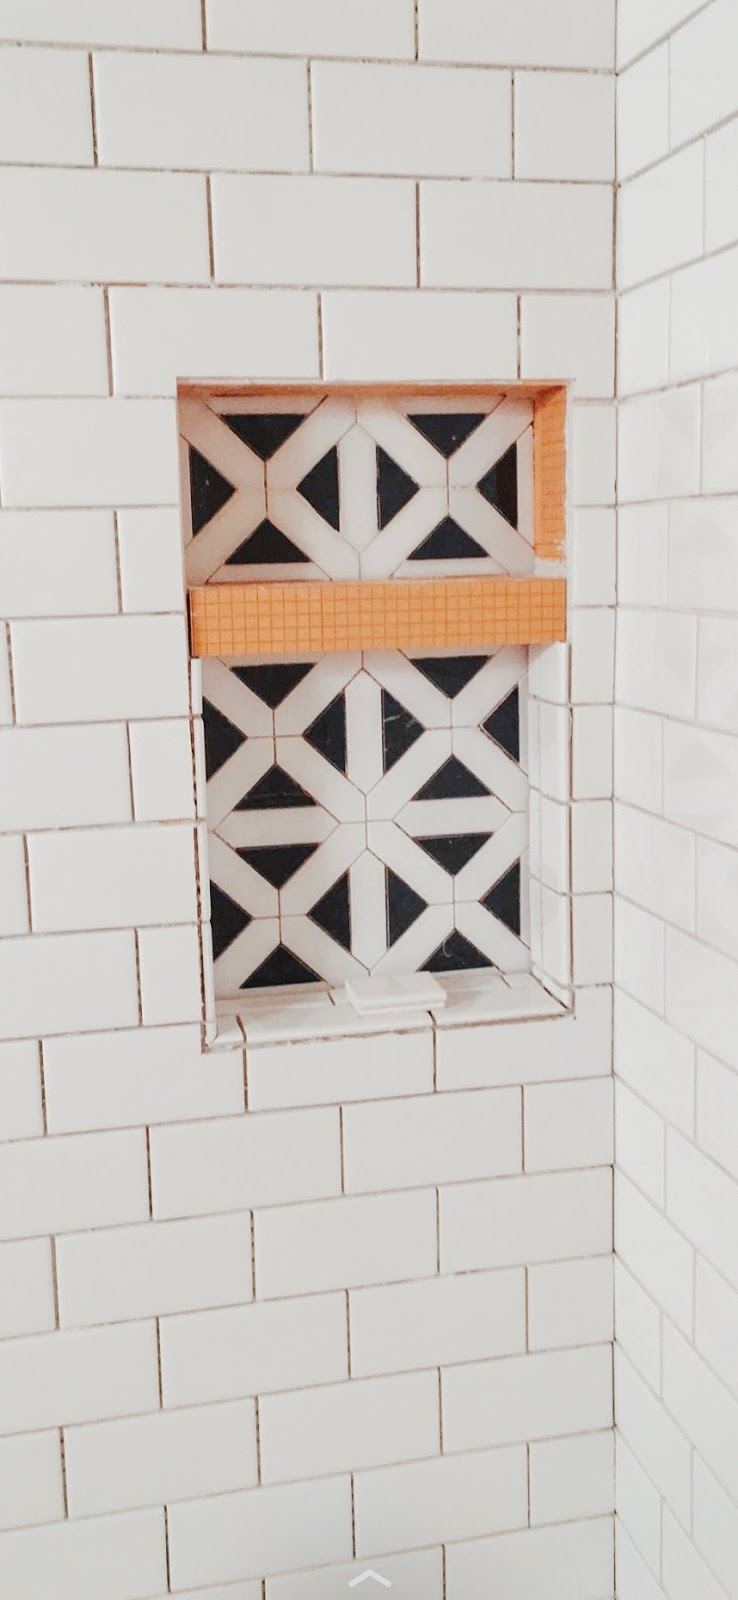
Next step is the floor tile. My FAVORITE part.


Oh, how dreamy it is. We then called the plumber back to install the appliances, due to running out of time (we had my husbands parents staying with us and using this bathroom the next day). We felt the extra $400 was absolutely worth it due to the swiftness of the project being completed and knowing it was done right. We completed the project by painting the ceiling, walls, trim and door white to make the space seem fresh and clean. We love using Simply White by Benjamin Moore and have used it in 3/4 of the rooms in our home. With no natural lighting in our bathroom, we knew that white would be a good choice.
Beckett loves his new bath. What perfect timing for cleaning all of the dirt off of summer knees and sunscreen greased hair.


Here's what the bathroom looked like before! What a transformation! We are still looking for the perfect pieces of art and a vintage rug to add some variety. Shelves above the toilet with live house plants will be added too! I will do a follow up post about styling the bathroom when we finish it! We don't want to rush it, to find pieces we really love that work in the space.

BEFORE

AFTER
A bathroom DIY remodel is a rewarding project that transforms the space while saving money. It begins with planning—choosing a style, setting a budget, and listing necessary tools. Common updates include painting walls, changing light fixtures, upgrading faucets, and replacing cabinet hardware. Installing peel-and-stick tiles, refinishing a vanity, or hanging open shelves adds charm and function. With patience and research, even novice DIYers can tackle tasks like regrouting or updating mirrors. Safety and proper measurements are key. A successful remodel refreshes the bathroom’s look, improves functionality, and gives a sense of pride—proving that big changes can come from your own hands. https://avahome.pk/
ReplyDeleteThis comment has been removed by the author.
ReplyDeleteIf you're looking to renovate your small bathroom there are many ways to transform your bathroom. From upgrading fixtures to painting, changing tiling or installing a walk-in shower, there are countless possibilities for updating a bathroom. You can choose designs with My Home Handyman that cater to every kind of aesthetic, from modern to traditional, while enhancing both functionality and beauty.
ReplyDeleteFresh tiles completely changed the look! Bathroom Remodeling Experts Houston
ReplyDelete"We bring the warmth back Call today for service you can trust! Our team is ready to help keep your home comfortable and your water heater running perfectly. Reach us at 346-569-8027 or Jeni's of Water Heater
ReplyDeleteto schedule your service. Your comfort is just one call away!"
Dry rot can spread fast, so timely repair is essential. This post highlights the importance of expert assessment and long-lasting solutions. Very helpful insights for homeowners!Read more info about remodeling contractor Kelso WA
ReplyDeleteVery efficiently written information. It will be beneficial to anybody who utilizes it, including me. Keep up the good work. For sure i will check out more posts. This site seems to get a good amount of visitors.
ReplyDeletebathroom shower accessories
FC569931
ReplyDeletedörtyol esçort
avşa esçort
ağva esçort
yenişehir esçort
avanos esçort
kalkan esçort
finike esçort
gemlik esçort
konyaaltı esçort